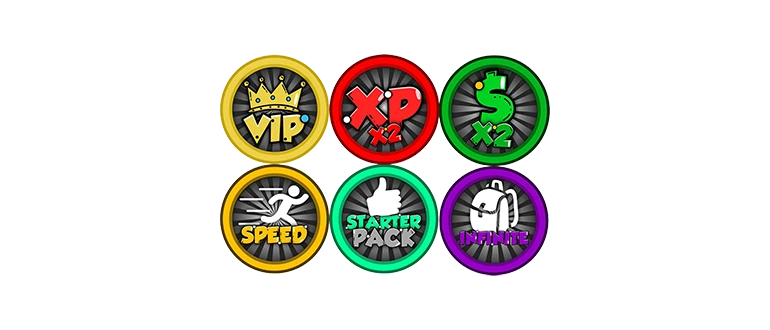
Simply put, a Gamepass is a set of tools that allow you to earn money from a particular game. For example, if a person wants to gain some advantage, they pay a certain amount of in-game currency (in this case, Robux) and buy a perk. The money goes to the game developer, thus supporting them. Let’s go through the process of creating such functionality in Roblox step-by-step.
What is a Gamepass
Before we proceed to the process of creating your own Gamepass in Roblox, let’s briefly look at what it is. For example, you have created your own simulator, and it is visited by a certain number of players. They will have the opportunity to improve their progress or speed it up by purchasing additional features. These purchases are made using Gamepass.
For instance, it could be a VIP room, exclusive weapons, enhanced physical abilities, and so on.
Note that in Roblox, payment for Gamepasses is made exclusively using Robux.
How to Create Your Own Gamepass
Now let’s move on to the instructions and step-by-step consider how to create your own payment method in our game. All functionalities can be implemented not only on a computer but also on a phone running Android.
- The first thing you need to do is publish the newly created game if it is not yet publicly available. The detailed process of creating levels in Roblox Studio is described on the relevant page.
- Next, open the developer site and click on the user icon in the upper right corner. Select the second tab called “Creations”. Click on the published map and, clicking on the gear icon, select the option marked in the screenshot below.
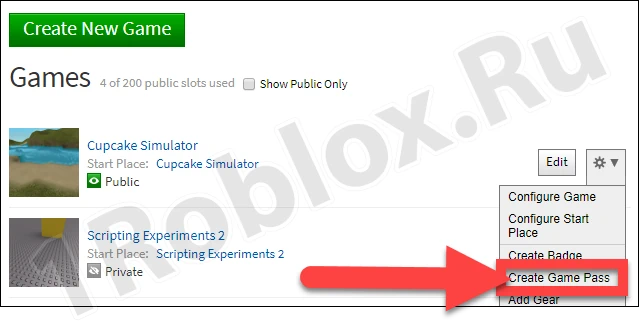
Note: The “Edit” button allows you to perform other operations with the project, such as deleting the Gamepass.
- We also need an appropriate icon. At the next stage, you will be prompted to choose such an image. To do this, click the button marked by the arrow in the picture below.
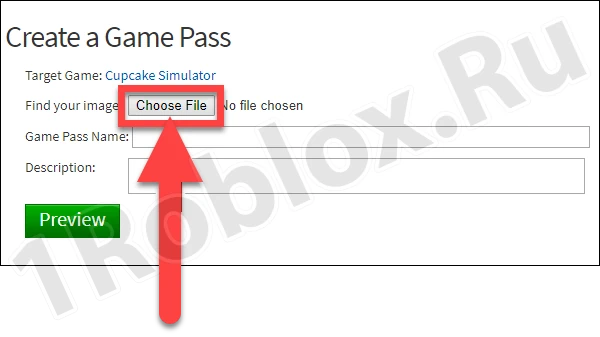
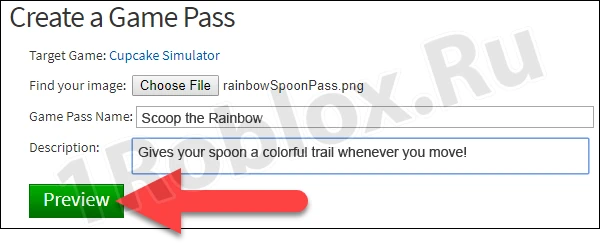
- The next step involves entering the name and description.

Be careful when filling this out. The name directly affects how effectively donations will work in the game. The player should clearly understand what they are paying for and what advantages it will provide.
- Return to the icon and click the preview button. As a result, you will see the image as it will appear to users. If everything is fine, proceed further.
Now all that’s left is to add the project to Roblox Studio using the appropriate script.
There is another important question we often see in the comments. People ask: “How to change the price of an existing Gamepass.” Let’s figure it out:
- Find the project we just worked on. Then select the gear icon. A drop-down list will open where we need to select the option marked by the arrow in the screenshot below.

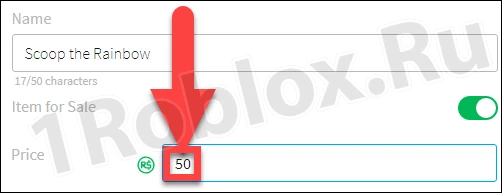
- Activate the trigger that allows further editing.

- Now you can change the cost of the service. Enter the number (representing the amount of Robux per purchase) and save the changes made.
Note: Since we worked with the Roblox site, all the same actions can be done on a PC as well as on an Android smartphone.

