

Many users, after playing Roblox, start thinking about creating their own simulator. In such cases, there are many questions, most of which you can find answers to on the main page of the site. This guide will explain how to save your map in Roblox Studio.
Difference Between Saving and Publishing
The question raised in the first paragraph can have one of two directions:
- Saving the project for further development. In this case, we are working on our own level and then save it to continue development the next day or later. No changes are made to the server in this case.
- Publishing a finished map. This is a completely different option. It involves publishing the finished level and providing access to it to all users.

Let’s Get Practical
Next, in the form of a step-by-step guide, we will consider both cases, as well as explain how to save the map for further work or publish the final result.
How to Save a Map in Roblox Studio
If you have started creating your own level in Roblox Studio and haven’t finished the work yet, but need to step away from the computer, you need to save the project to continue working on it the next day or later. It is best to proceed as follows:
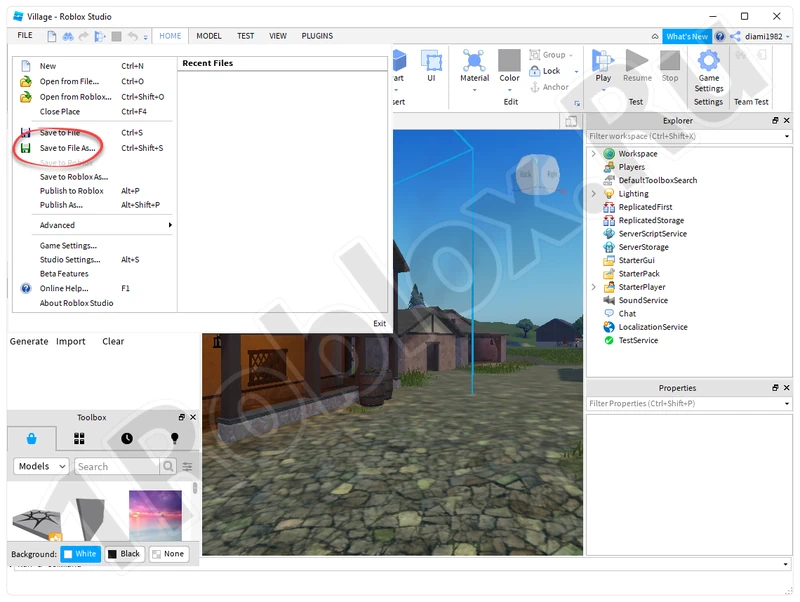
- In Roblox Studio, select the main menu item “File”, then click on the item marked in the screenshot.
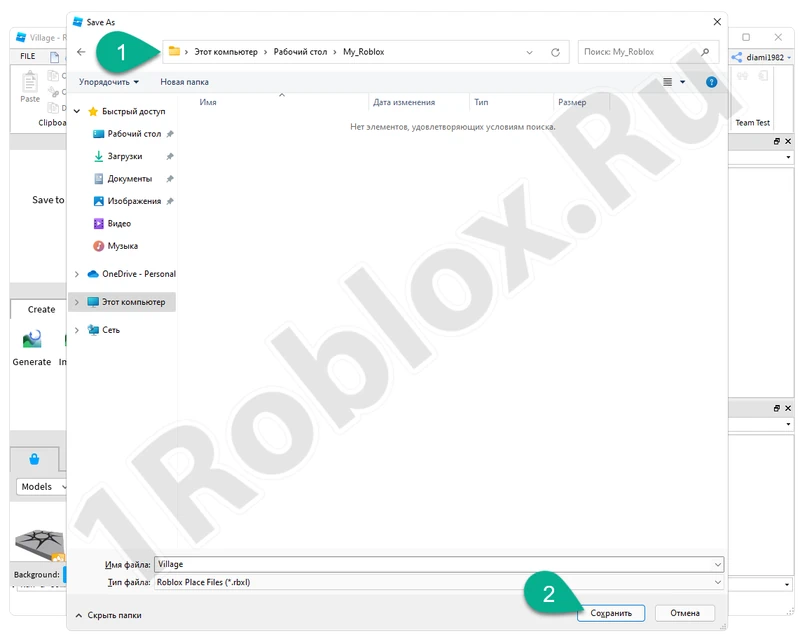
- A Windows Explorer window will open, where we need to select a directory to save the project. Once the folder is specified, click the button marked with the number “2”.
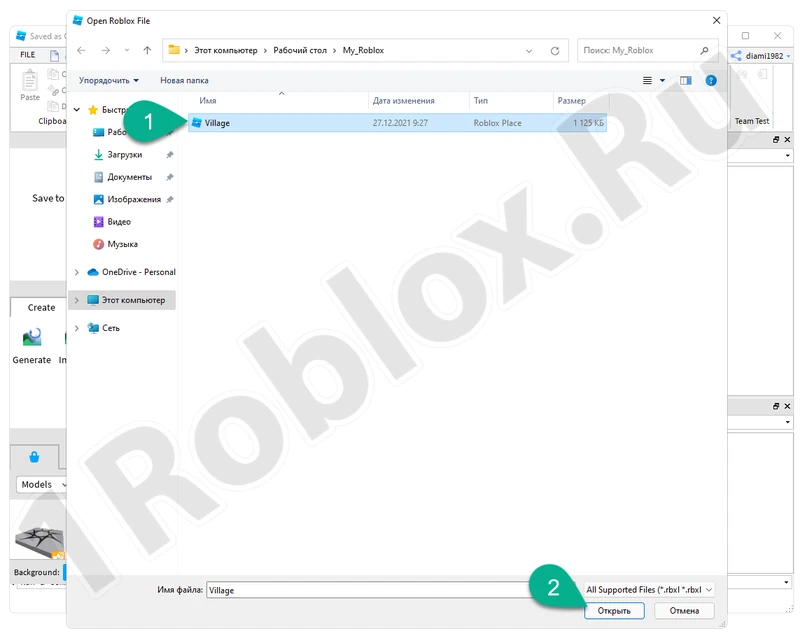
- When you want to return to work again, simply launch the application, once again, open the “File” menu and select the item marked with the red line.

- In the Explorer, select the directory where the save was made. Highlight the desired file, then click “Open”.
As a result, the project you were previously working on will open, and map creation can be continued.
How to Publish a Finished Map
If work on the map is completed, we can publish it and provide access to anyone interested. To do this, follow this scenario:
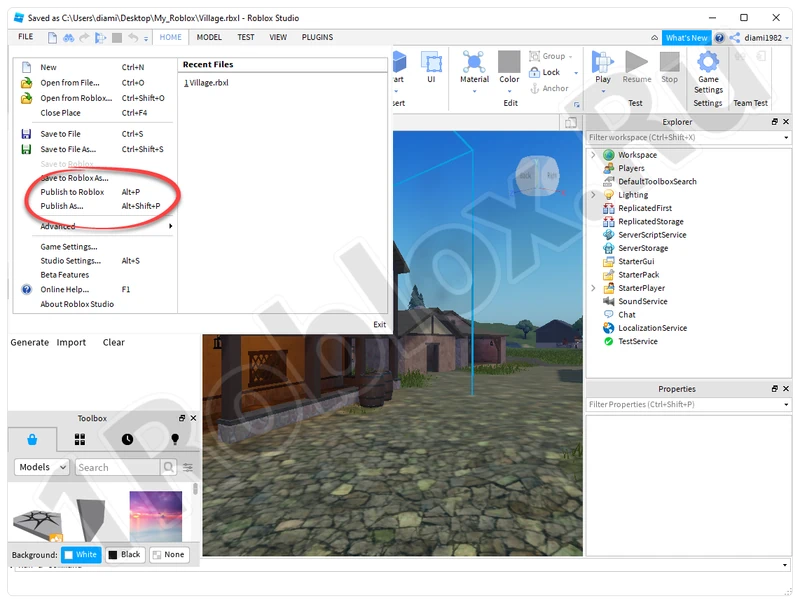
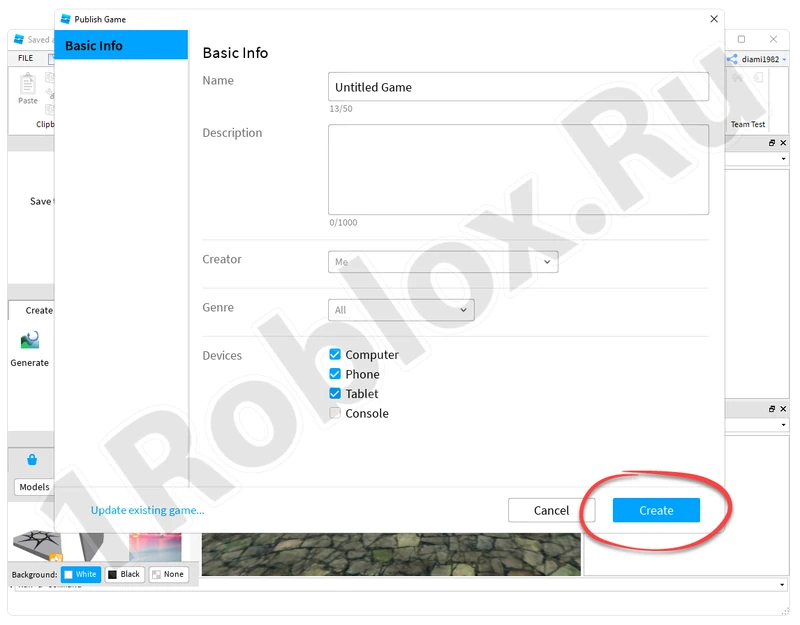
- Launch Roblox Studio (if the program has not yet been opened). From the main menu, open the project you were working on, or if the last one is already open, simply publish it. To do this, in the main menu, select the “File” item, and then from the context menu, choose one of the two options marked in the screenshot below.
- A form will appear containing basic information about the created map. Here we can:
- Specify the name of the mode.
- Enter a short description of the future map.
- Set the developer’s name.
- Choose devices that can be used in this simulator.
- Once all the necessary fields are filled in, all that remains is to click the button labeled “Create”.
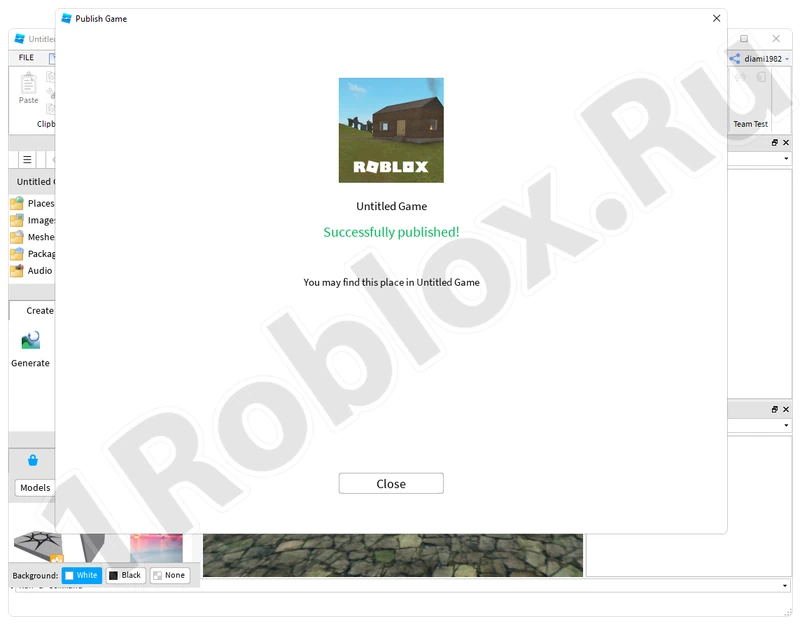
- Immediately after the map is loaded onto the server, it will become available, and anyone interested can start playing.
We can also set the access mode to the created level. For example, anyone can play, or only users with a link can access it.