
In the beta testing mode of our game, voice chat is already available. However, it’s disabled by default. The goal of this step-by-step guide is to explain to the user how to enable the microphone in Roblox. Let’s go through it step by step.
Age Verification
Initially, you should go to the Roblox website and verify your age to activate voice chat in the game:
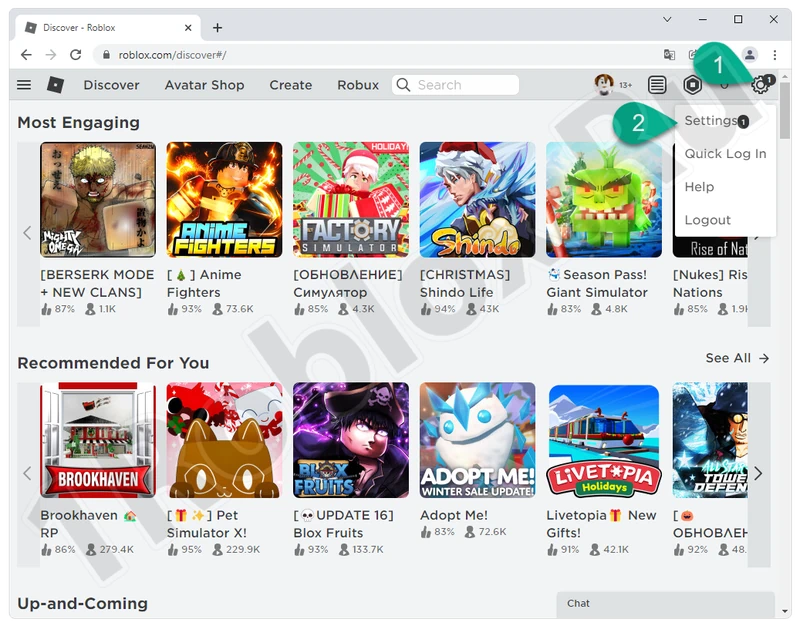
- Click on the gear icon in the top right corner. From the dropdown menu, select “Settings”.
- Next, switch to the “Account info” tab, then in the right half of the window, set your date of birth, and click the button marked with the number “2”.
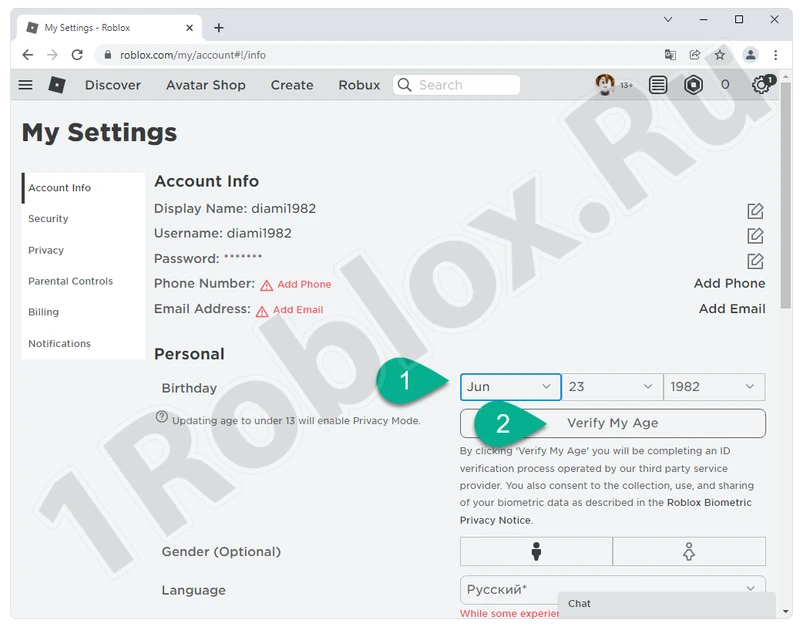
Note: If you set the birth date of a person under 18 years old, you won’t be able to enable voice chat. These are the rules of Roblox.
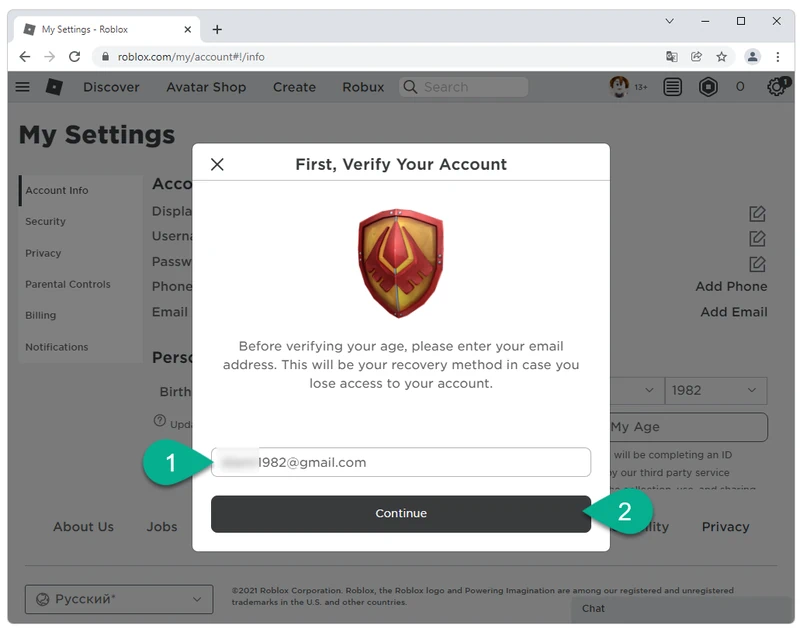
- After entering the date and clicking the button, you’ll be redirected to a special page where you’ll need to enter your email address and confirm it.
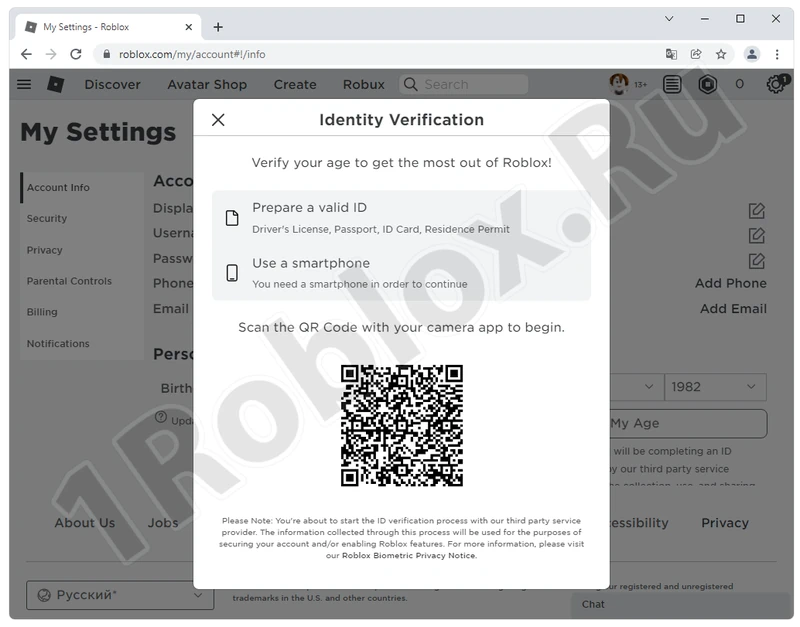
- Next, you’ll need to scan the QR code with your smartphone, on which the game is also installed.
After that, we can proceed to enabling voice chat in Roblox.
Voice Chat Activation
Stay in the settings section, but now select “Privacy” on the left side of the window. In the right half, activate the toggle next to “Enabled Voice Chat”.
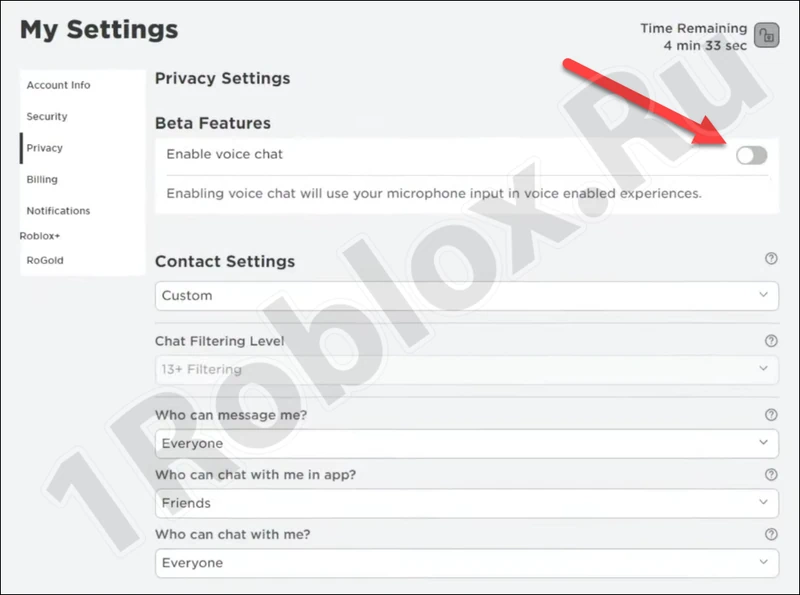
Done. Now you can launch Roblox Player and proceed to enable the microphone in the game.
Enabling Microphone in the Game
Using the “Esc” button, open the settings. Then go to “Settings”. Set your default microphone as the input device.
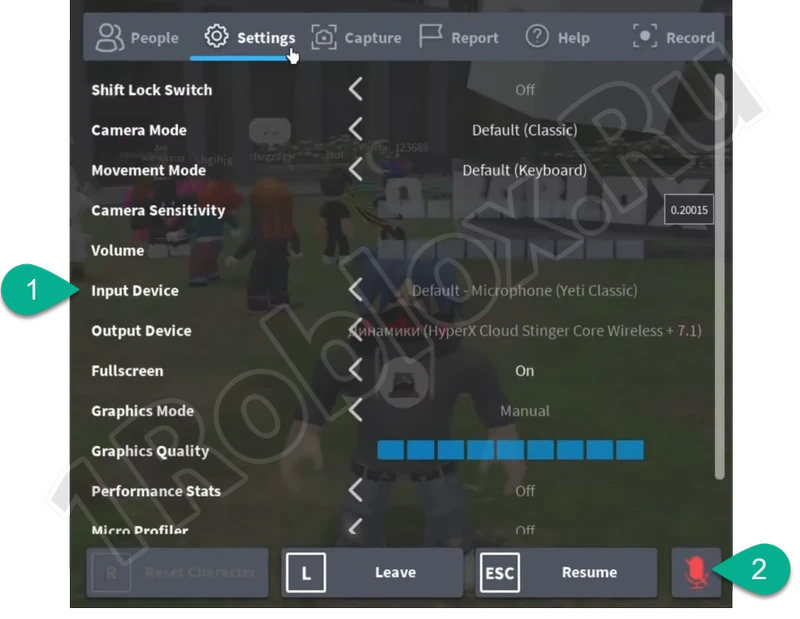
Done. Now you know how to talk through the microphone, and voice chat in Roblox will work on PC and mobile.
