Utilities that change shaders in Roblox allow you to customize the game’s appearance in ways that the default client does not offer. Simply put, you can adjust the graphics by tweaking various parameters. Here is a step-by-step guide on where to download these modifications, how to install them, and how to use them in the game.
What are Shaders?
Let’s take a closer look at what shaders are in Roblox and why we need them. There are several applications that allow you to semi-automatically add and configure graphics in the game. By default, there is a list of filters that improve the graphics. Users can install various modifications in a special menu and then flexibly configure each one.
If you want to learn more about this topic before starting the installation, scroll to the end of this guide and watch a short tutorial video on the subject.
How to Install
Let’s proceed with the installation of a special program that allows you to quickly and, most importantly, for free, download, install, and use the best shaders in Roblox to improve graphics on low-end PCs:
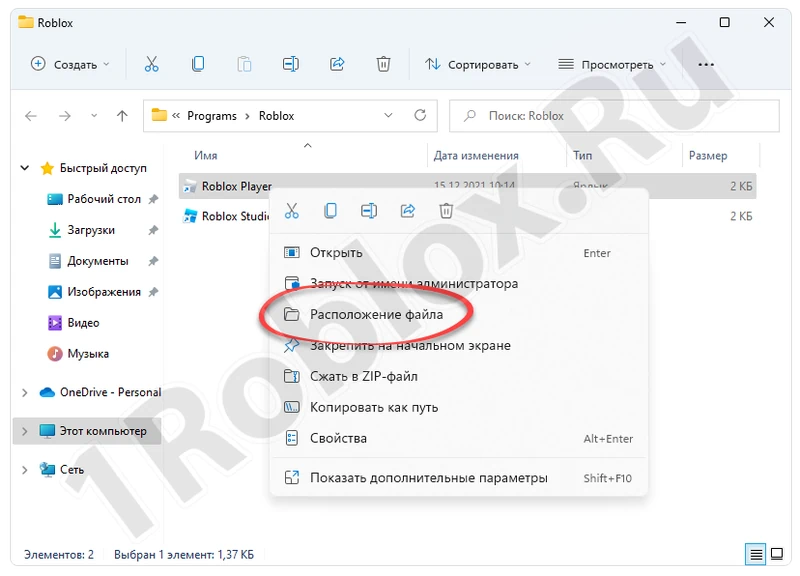
- First, scroll to the end of this page and click the button to download the archive. Next, open the “Start” menu, find the Roblox launch icon, right-click it, and select the option marked in the screenshot below from the context menu.
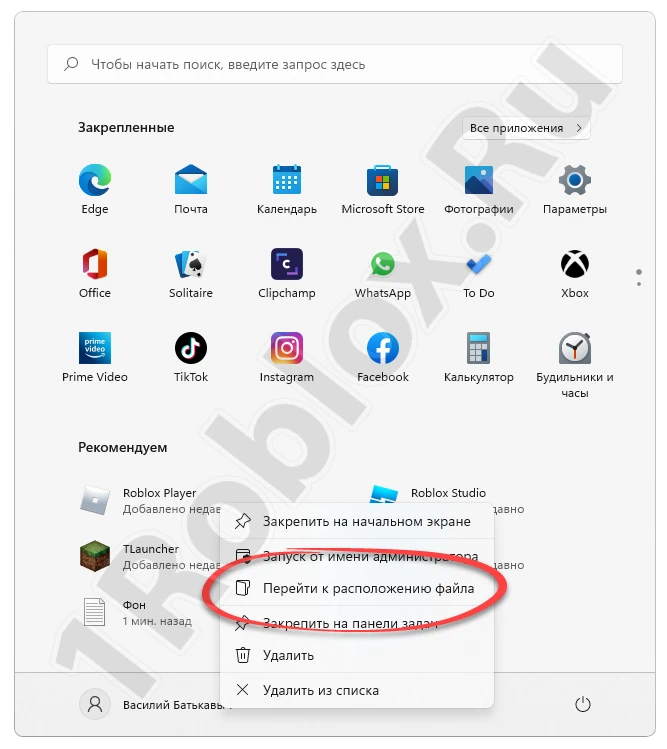
- You will be taken to the folder with the game shortcut. Right-click it and do the same as in the previous step.
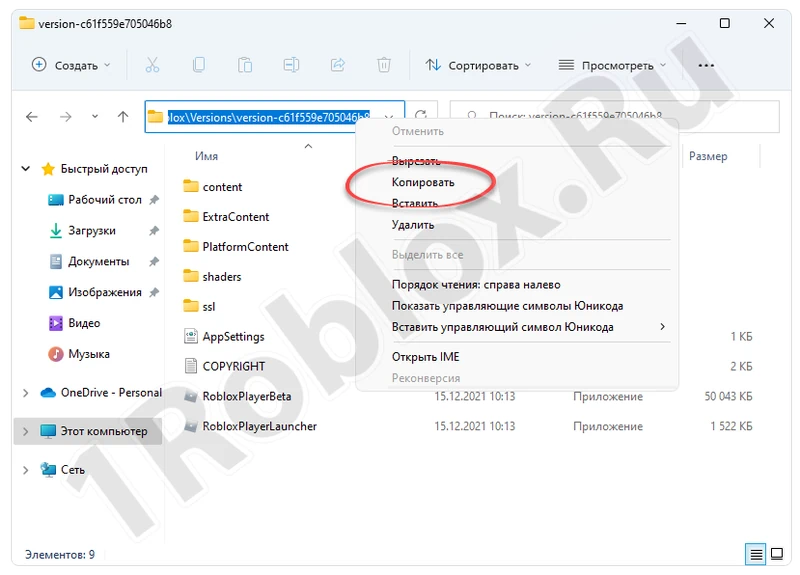
- This will take you to the folder with the installed Roblox. Highlight the path in the address bar of the window, right-click again, and copy the contents to the clipboard.
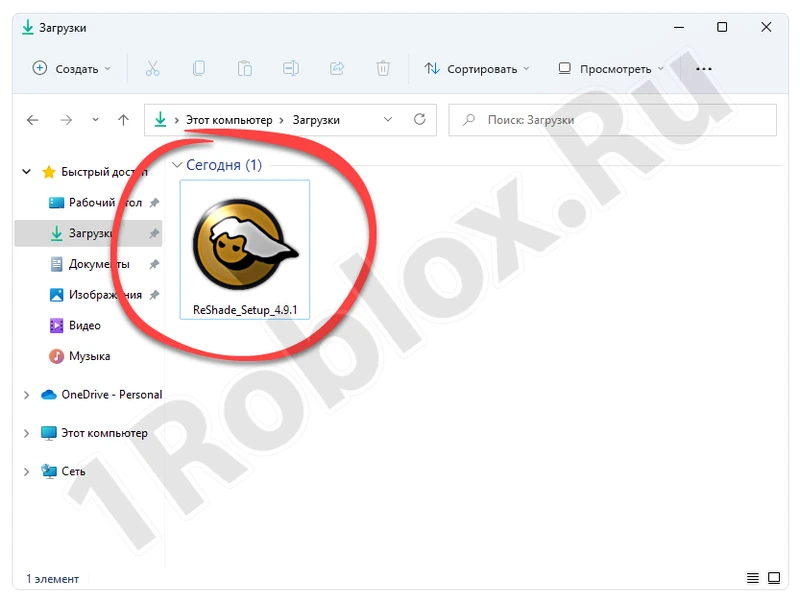
- Unzip the downloaded program, then launch it with a double left-click.
- In the small window that appears, select the button marked in the screenshot.

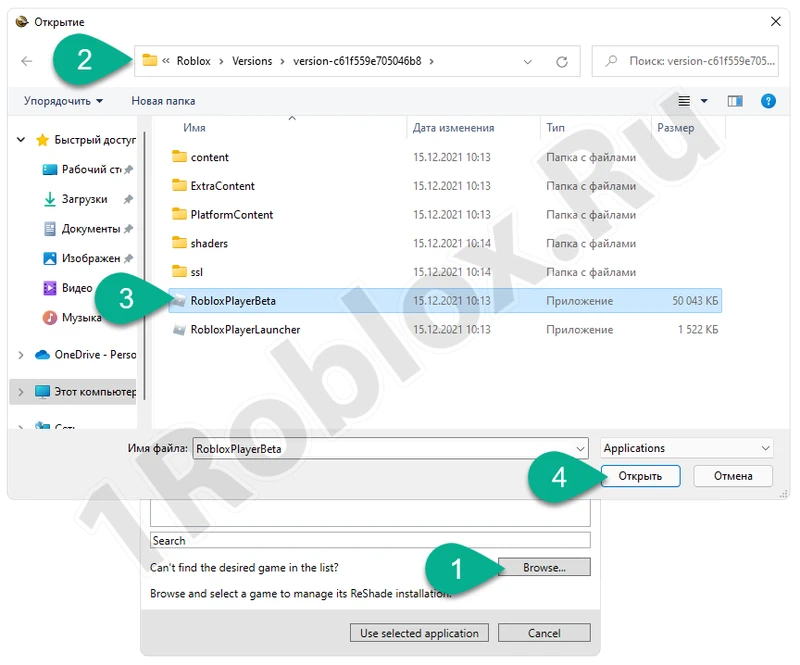
- Next, click “Browse”, paste the clipboard contents into the explorer address bar, select the file marked with the number “3”, and click “Open”.
- On the next step, select the “OpenGL” mode.

- Check all the boxes in the new window. Click the “OK” button.
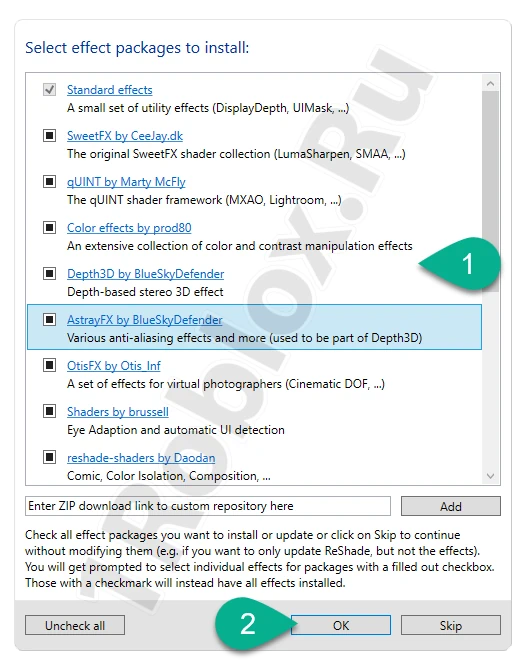
- Ensure that there is a checkmark next to each item. Click the button marked in the screenshot again.
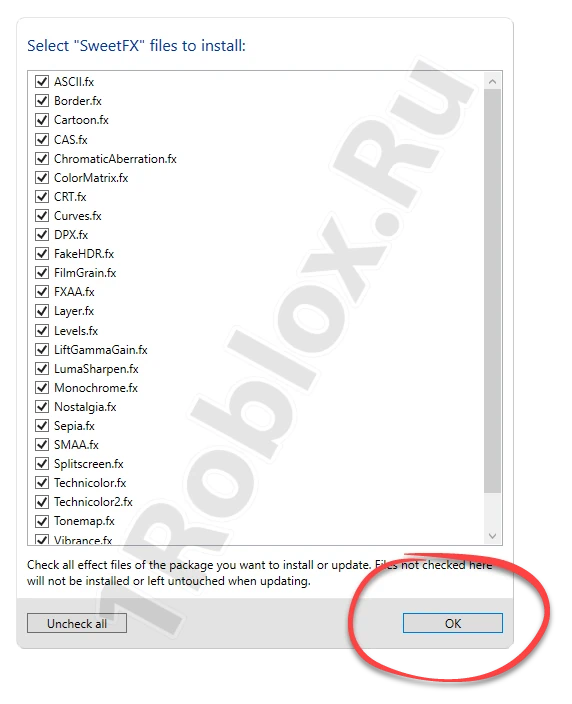
- Wait for the application to download all the necessary files.

- Ensure the installation was successful by checking for the corresponding message. Now you can close the window.

How to Use
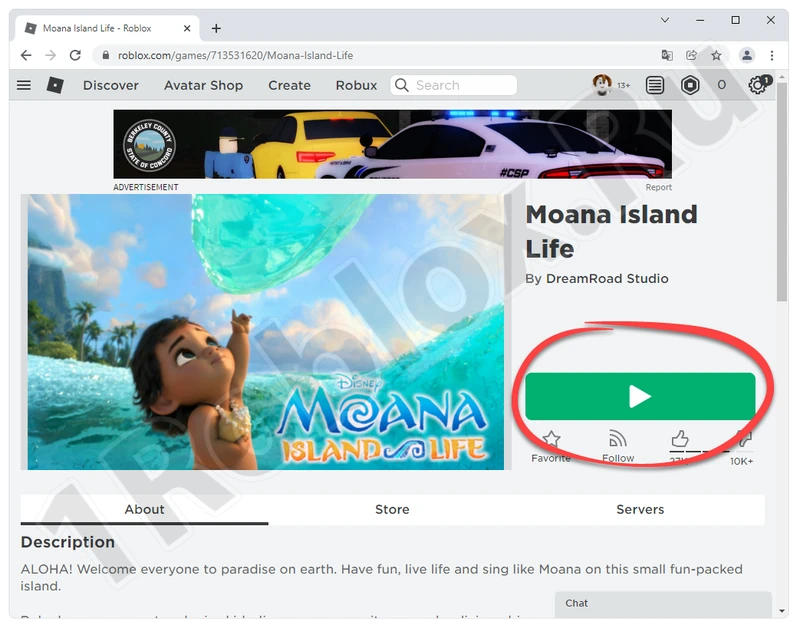
To use shaders in Roblox, simply go to the game site, select one of the modes, and click the launch button.
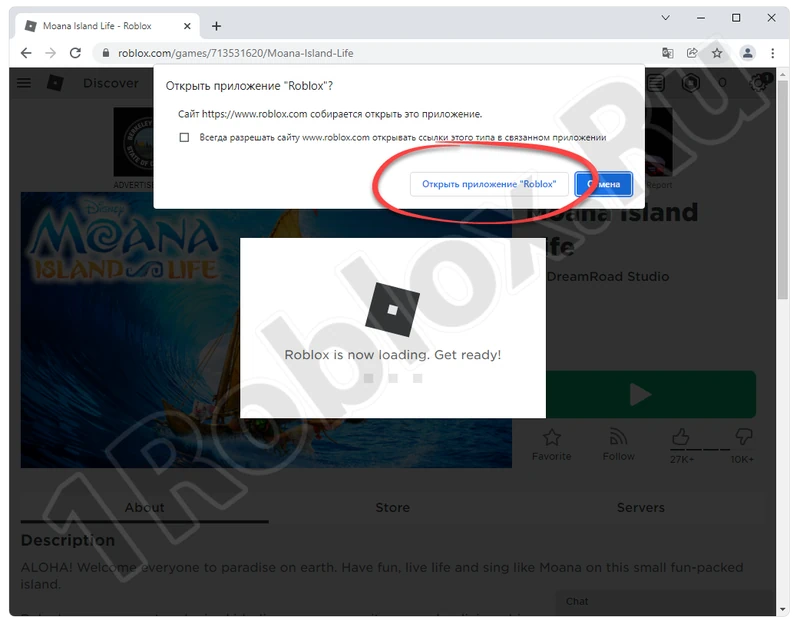
Confirm your intention by clicking the control element marked in the screenshot.
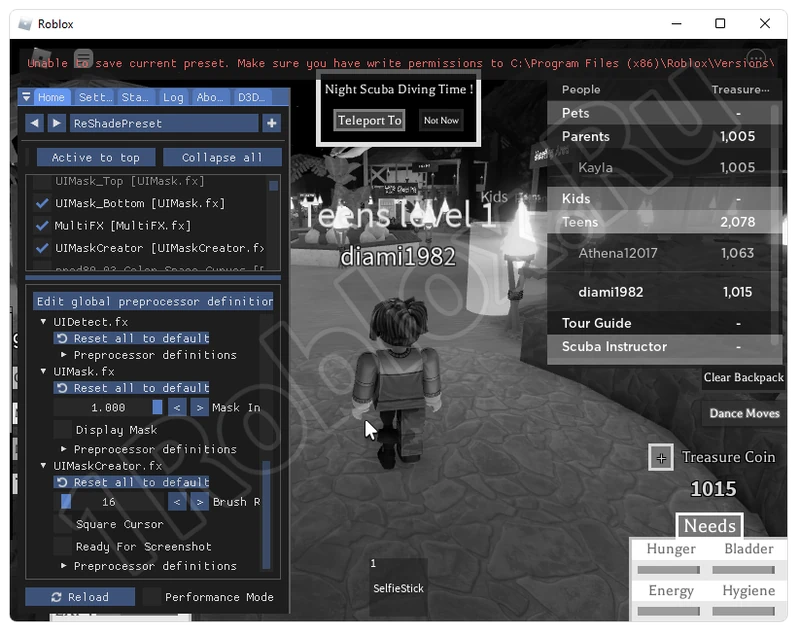
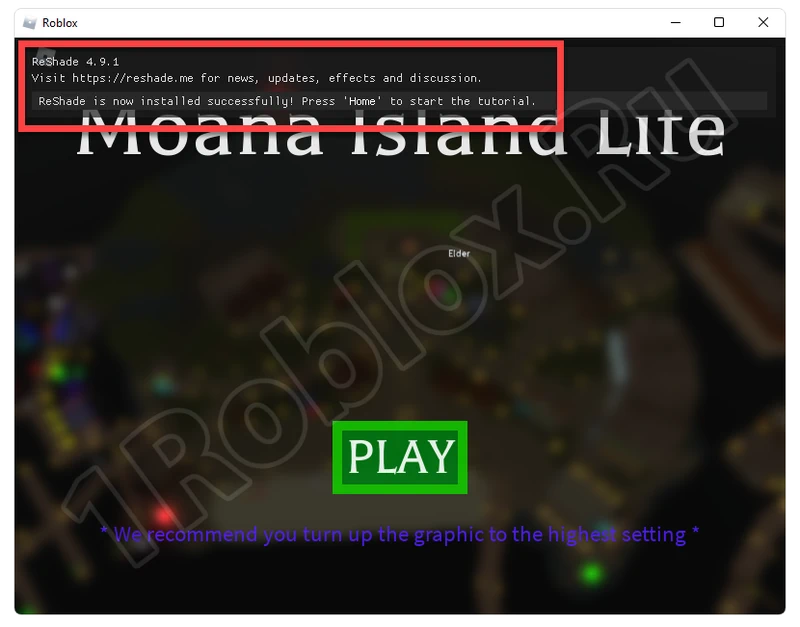
You will see that the ReShade program’s user interface has appeared in Roblox.
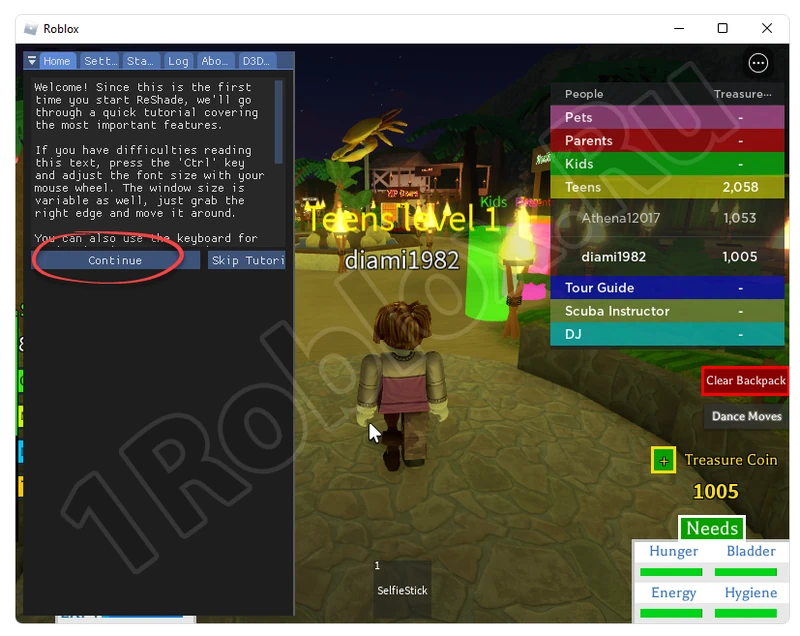
Skip all the tutorial prompts by repeatedly clicking the “Continue” button.
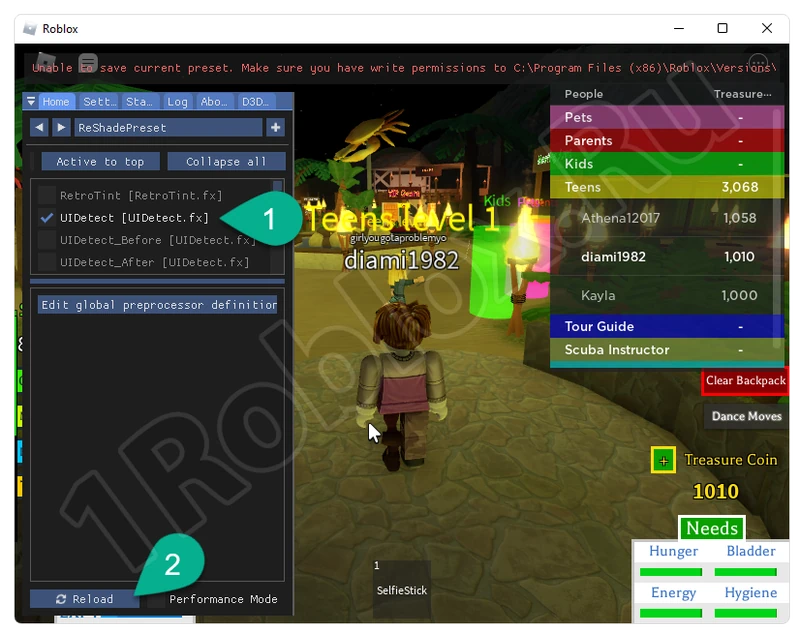
You can now work with shaders. Check the boxes next to the functions you want to use. To apply any changes, click the button marked with the number “2”.
Note: To switch between groups of different shaders, you can use the tabs located at the top of the window.
After selecting the shaders, additional settings will appear at the bottom of the window, allowing you to fine-tune the changes.
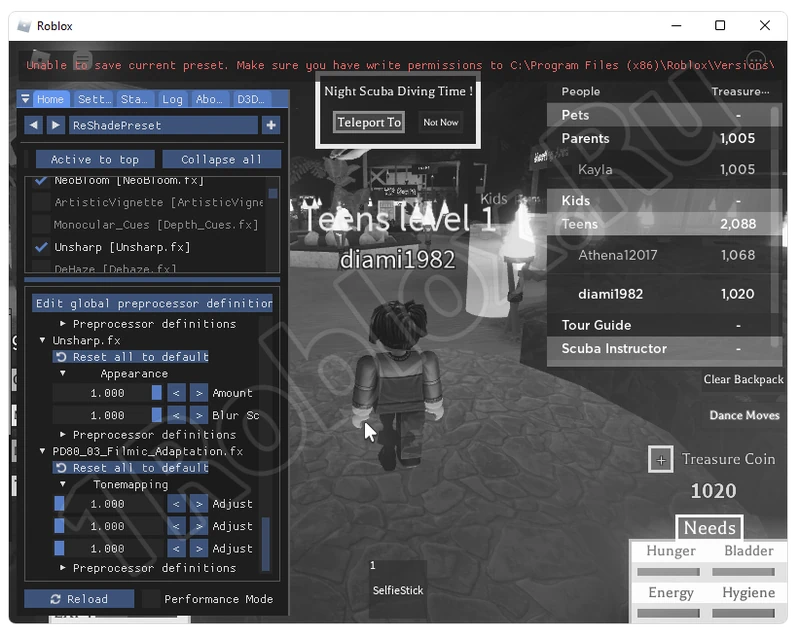
This is how shaders are used in Roblox.
Important Features
Here are some nuances to be aware of, which may be crucial in certain situations:
- Using shaders reduces game performance and significantly lowers FPS. On low-end computers, you may experience lag.
- Using shaders does not violate game rules and will not result in account bans. You are only changing the appearance of the user interface on your end.
- You do not need to reinstall ReShade every time Roblox updates.
Download
You can now proceed to download the application for your laptop and use it according to the instructions provided above. The file has been checked by us and is virus-free.
By the way: shaders for Android phones or tablets do not yet exist. There is no application capable of changing them.
